
Welcome to part 2 of our article series where we describe the process of building the platformOS documentation site from discovery to development, with in-depth insights into our approach, decisions, plans, and technical implementation.
Now that you’ve seen how we explored the needs of our audience, outlined the types of content we’d work on, and created a sitemap in part 1, let’s move on to discuss how content production started, and how we created the layouts and navigation for the site.
Content-first design
The goal of a documentation site or developer portal is to provide easily accessible, well-structured information for self-support and learning. As opposed to a sales landing page or a webshop, the aim of a documentation site is not to persuade or allow the visitor to complete tasks (e.g. buy something), but to provide information that is written, edited, and structured in a way that best fits the user’s needs.
Because technical writing (and all writing with the purpose to eventually be read) should start with knowing who you write for, we started with an in-depth exploration of our audience. Right during the discovery phase, we made all our decisions based on our personas and what we’ve learned about them. Now, that we had an idea of what they needed, we wanted to explore what types of content we’ll create for them, and think about the display of the content only after that. This is what content-driven design means: we make sure that content is our top priority, and we start designing with existing content (or templates) instead of dummy text to be able to see what design would fit best around it — and not the other way around where you have designs signed off before you start to produce any content, and then desperately try to come up with copy that you could pour into the design.
Community contributions
Right from the start, we knew that we wanted to build a community-driven documentation site, meaning we wanted to provide all the tools and encouragement for our users to contribute to our docs.
As we planned to go back and re-evaluate all of our initial assumptions, we welcomed feedback through many different channels, like the built-in feedback block on each page, Slack channels dedicated to our early adopters, surveys at the end of each development phase, email, weekly community meetings, etc.
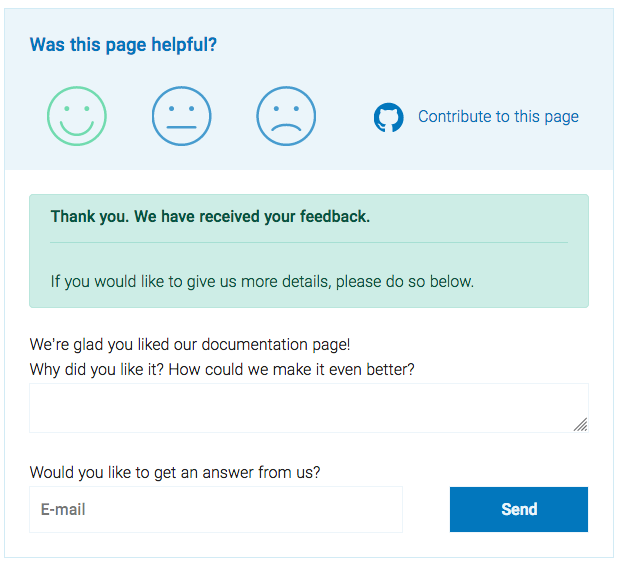
Feedback block at the bottom of each page
We also wanted to provide tools to make it easy for our users to contribute documentation topics or edit existing pages. We follow a docs like code approach: you can contribute to our docs through GitHub. To preserve consistency and help our contributors get started, we created a content framework and editorial workflow that user contributions can be an integral part of.
Style Guide
To ensure a consistent communication style throughout our documentation, we started with defining our standards for grammar, syntax, and the different types of technical content we have, in our style guide.
Our style guide is just as much a work in progress as our documentation, but we’ve defined the basics that internal or external contributors need:
- Grammar and syntax correspond to the Chicago Manual of Style. We didn’t try to reinvent the wheel here, we chose a well-known style guide that works for us.
- Our documentation consists of different types of topics, like tutorials, concepts, references (e.g. API documentation). To help contribution both for writers and editors, we specified the structure of each content type in ready-to-use templates.
- Contributors are welcome to edit our style guide just like they are welcome to edit any documentation topic.
Templates
Our site uses Liquid pages, but to make editing easier for contributors, we write documentation content in GitHub Flavored Markdown and use a Markdown converter to turn it into Liquid. Our templates include all non-changeable content, and placeholders with explanations for the parts to add. Placeholders provide information on the recommended format (e.g. title), and any requirements or limitations (e.g. maximum number of characters). Recurring sections, like the question block at the bottom of each page, are added using a partial.
---
converter: markdown
metadata:
  title: [TITLE, format: VERBing a(n)/the NOUN(s)]
  description: [short description of the topic, can reuse first sentence, max 300 characters]
slug: get-started/install-docker-example
searchable: true
---

This guide will help you [describe what the user will achieve by the end of the guide]. [Explain goal, domain-related background information, any information that helps understand the purpose or terminology of the tutorial.]

## Requirements

[List of requirements with links (internal or external) and explanations where needed. ]

- [Requirement 1: explanation if applicable]
- [Requirement 2: explanation if applicable]
- [Requirement 3: explanation if applicable]

## Steps

[Purpose of the tutorial/title] is a [number of large steps, e.g. two]-step process:

1.  [step 1 short description, format VERB the/a(n)/your NOUN]
2.  [step 2 short description, format VERB the/a(n)/your NOUN]

### Step 1: [VERB the/a(n)/your NOUN]

[Full description of step with additional content, like code snippet, screenshot, etc.]

### Step 2: [VERB the/a(n)/your NOUN]

### Step 3: [VERB the/a(n)/your NOUN]

## Live example and source code
[optional: link to live site or source code on GitHub]

## Additional resources
[optional: bulleted list to additional external resources]

## Next steps

Congratulations! You have [what the user has achieved].
[Describe what the user can/has to do next.]

- [Link to next tutorial]()
- [Other link to next tutorial - if applicable]()

{% include 'shared/questions_section' %}
Tutorial template
Editorial workflow
We built an editorial workflow that works for all participants (writer, developer, contributor, etc.) and all stages of the process (writing, reviewing, editing). As mentioned before, we treat our docs like code, each stage of our workflow is in git:
- Write new content in Markdown using the templates. You can use any editor that can produce Github Flavored Markdown.
- Submit the new topic as a pull request on Github.
- Review. We have a peer-review system in place for code and docs alike. Topics are reviewed by both technical reviewers (developers) and writers.
- Edit as needed. Repeat step 3-4 until approved.
- Merge approved pull request.
- Deploy to staging, then production.
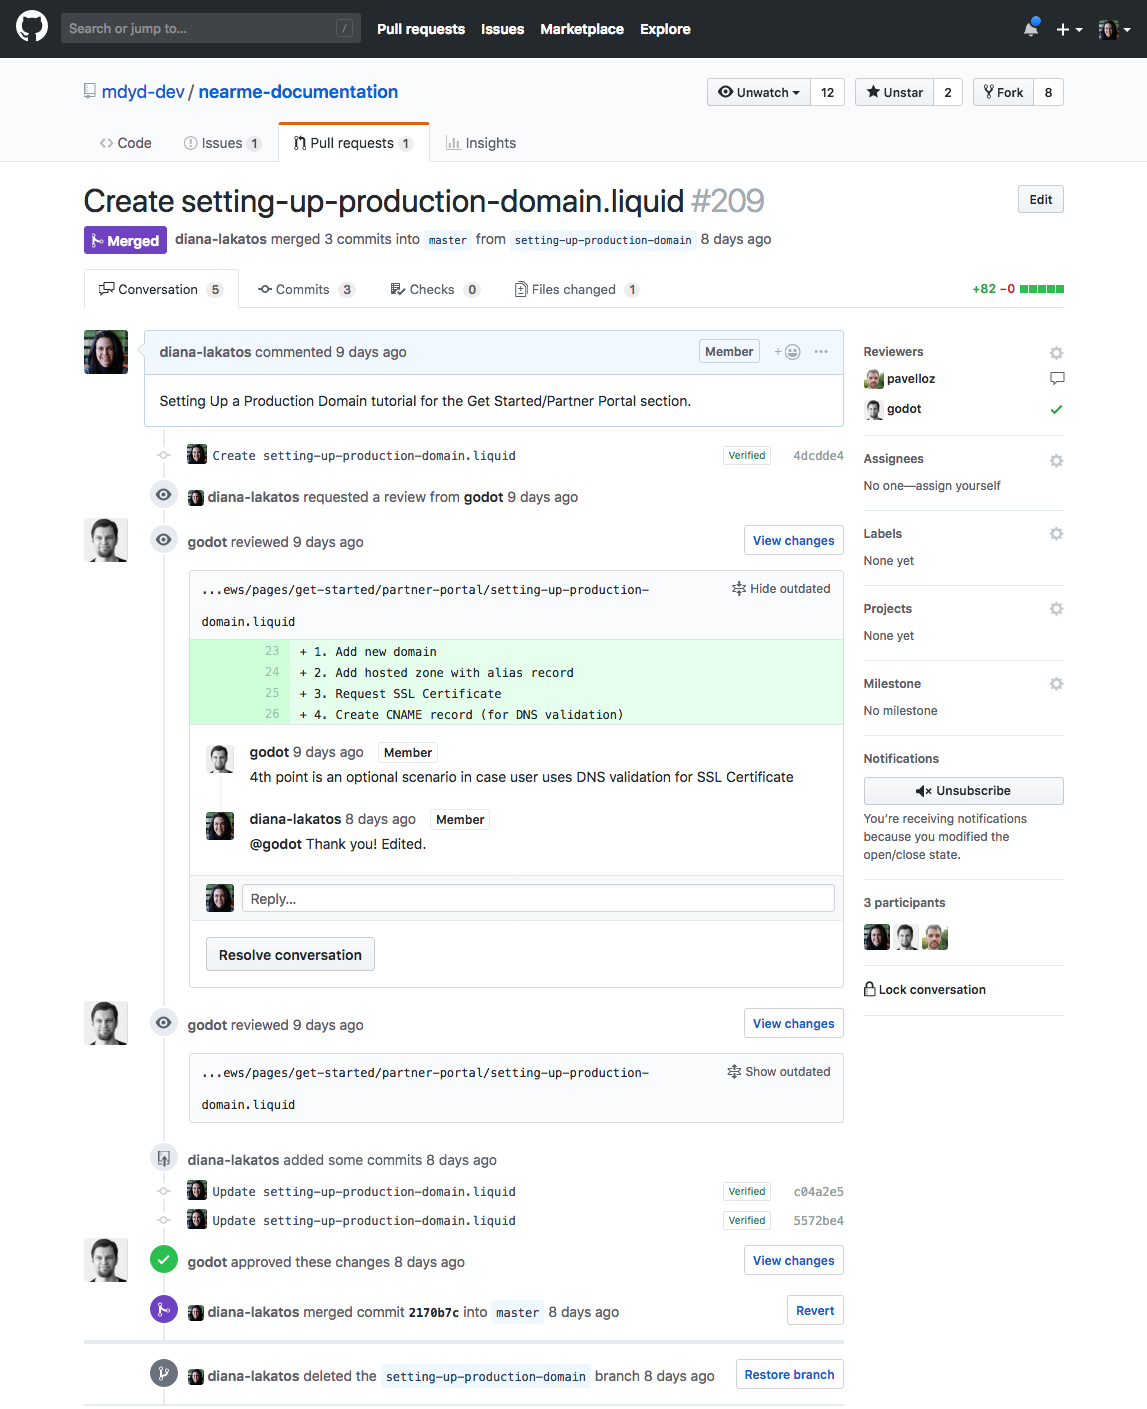
A documentation topic going through the editorial workflow on Github.
For changes, we follow a similar process. We open a pull request with our edits to a topic, and then the changes go through the same review steps.
Wireframes
Once we finalized the templates (remember, finalizing means “final for now, but can be tweaked later”), and produced some initial content, we had everything we needed to start thinking about the layouts of different pages. We used what we’ve learned about our personas from the first phase, and collected patterns to identify how to best serve our audience. That helped us create the first wireframes, sketches of our user interfaces without any branding or design, that we iterated based on team feedback. We created wireframes for each layout in Balsamiq, and collaborated on them in Marvelapp.
We also thought about how we can evolve these pages in the future, and created separate wireframes or concepts for later development phases. This helps us plan our site development process. As we deeply rely on user feedback, we are prepared to iteratively adjust our layouts.
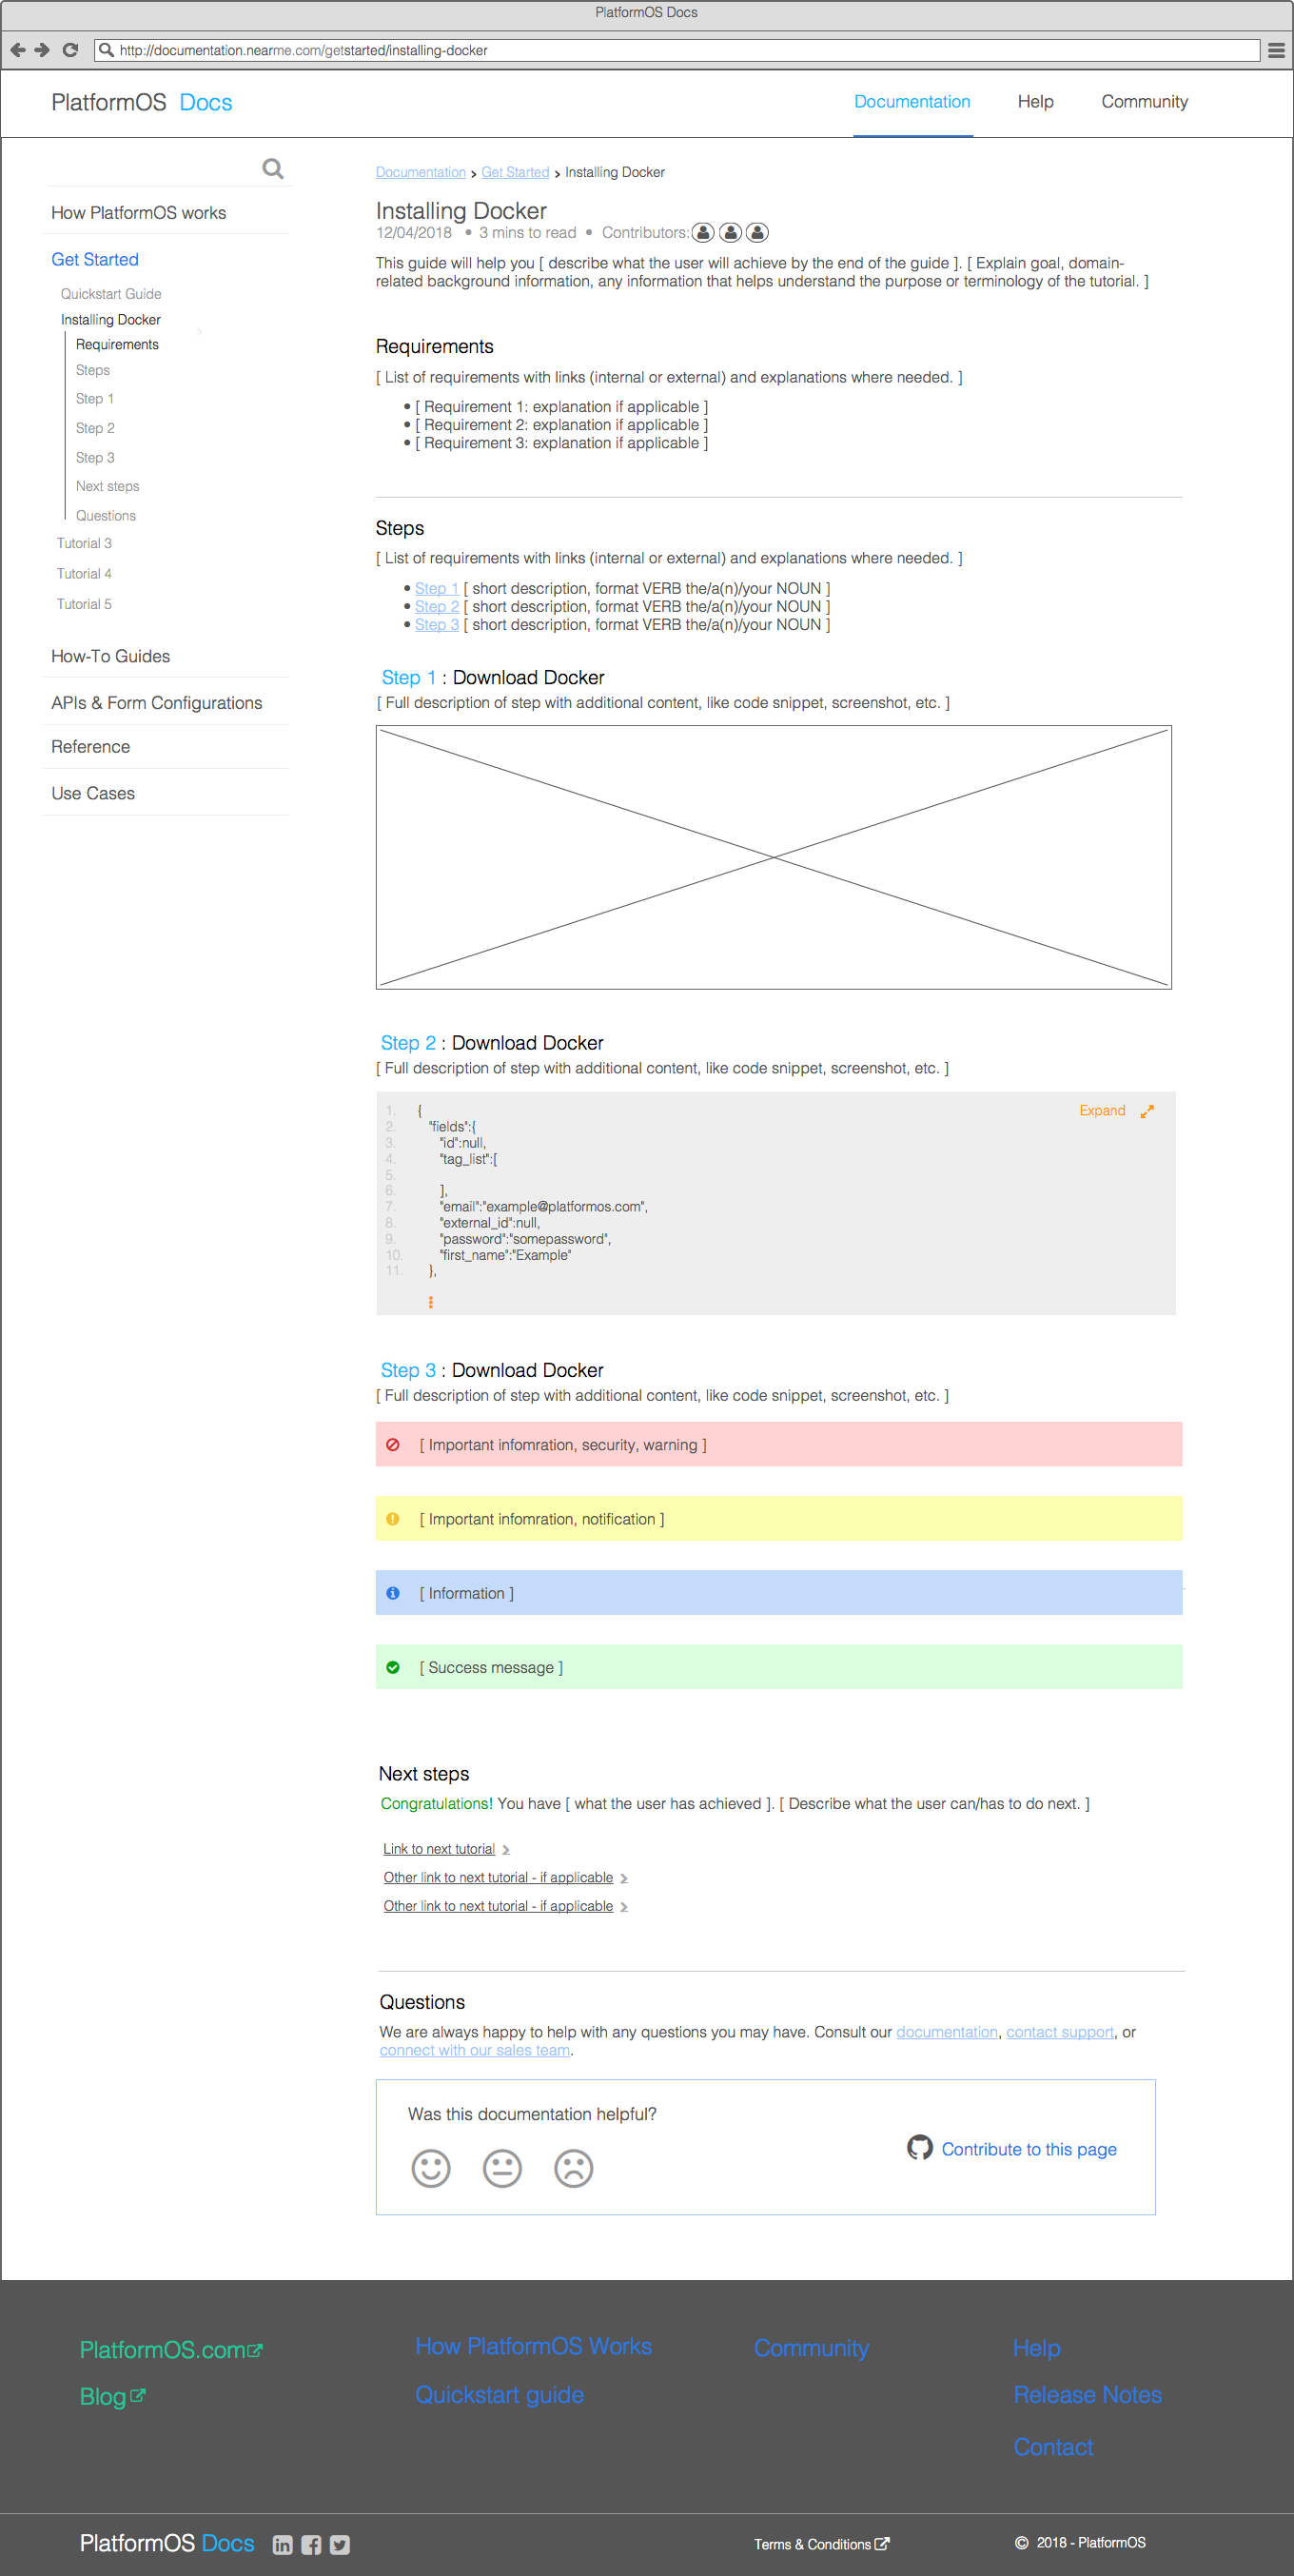
Wireframe for the tutorial topic type
Design
As you can see from the process so far, we put our focus on audience, content, and UX — leaving visual design for later.
Both the Design Thinking approach, and the Content-First approach we described in this article push visual design to a later stage. At the same time, the branding of platformOS is still in the making — with the help of the wonderful Yiying Lu. This means, that by the time our branding is done, we will have a working documentation site tested with real users, continuously improved based on relevant feedback. We believe that this way we could focus on the most important aspects for each phase, and our documentation site will have a solid foundation that the design can enhance. This is why, for now, we went with a very simple, clean design.
We hope you enjoyed learning about how we started content production, how we built our editorial workflow, and how we created wireframes for our documentation site. Stay tuned to learn more about the community aspects of our docs in part 3 of our series!
We involved UX Strategist Katalin Nagygyörgy in our process from the start. Through our collaboration, we could extract and collect all the necessary information using tried and true research methodologies and UX best practices.
This article was originally written for the platformOS Blog.