A Pirate’s Life for Me: Documenting APIs with Swagger
Our team started developing a new API (in C#), which I took as an opportunity to implement Swagger (now the OpenAPI Specification), an open-source project used to describe and document RESTful APIs. I wanted to show our developers and support engineers that injecting documentation into the code can reduce response time, mitigate errors, and decrease the point of entry for new hires. To illustrate those gains, I needed to develop a proof of concept.
Why Swagger?
Swagger is open source and includes a UI to display your API documentation, which can be built from source code or manually in JSON. Swashbuckle, a combination of ApiExplorer and Swagger UI, enables Swagger for .NET environments, which was just what we needed.
Note: This article applies to .NET environments. Swashbuckle uses a different package for .NET Core environments.
Prepare to Swashbuckle
Swashbuckle requires a bit of coding to implement, but using Paket helps to manage .NET dependencies. With Paket, I can add the necessary Swashbuckle NuGet packages to my API project and ensure that they are current. If I need to add more packages, I can install and manage those packages through Paket.
After installing Paket, I run the following command to add Swashbuckle as a dependency to my C# project.
paket add nuget Swashbuckle.Core project <projectName>
Now that Swashbuckle is available to my project, I can add Swashbuckle to the Startup.cs file, which is the application startup file for the API. I add each of the following Swashbuckle libraries so that the solution can access the necessary methods.
using Swashbuckle.Application;
using Swashbuckle.Swagger.Annotations;
using Swashbuckle.Swagger;
using Swashbuckle.Swagger.XmlComments;
Then, I add the following code (see the example that follows), much of which is supplied in a Swashbuckle example file. In the SwaggerGeneratorOptions class, I specify the options that I want Swashbuckle to enable.
-
schemaFilterspost-modify complex schemas in the generated output. You can modify schemas for a specific member type or across all member types. TheIModelFilteris now theISchemaFilter. We created anIModelFilterto fix some of the generated output. -
operationFiltersspecifies options to modify the generated output. Each entry enables a different modification for operation descriptions.
namespace LinkInterface
{
  public class Startup
  {
//Enables Swashbuckle and related Swagger options.
    private void generateSwagger(HttpConfiguration config)
    {
      config.EnsureInitialized();
      var swaggerProvider = new SwaggerGenerator(
      config.Services.GetApiExplorer(),
      config.Formatters.JsonFormatter.SerializerSettings,
      new Dictionary<string, Info> {
        version = "v1", title = "My API", description = "Provides an interface
        between our API and third-party services"
      }
      new SwaggerGeneratorOptions(
    //Apply your Swagger options here.
        schemaIdSelector: (type) => type.FriendlyId(true),
    //Implements the SwaggerTitleFilter class, which generates title members
    //in the definitions model of the swagger.json file.
        modelFilters: new List<IModelFilter>(){new SwaggerTitleFilter()},
        conflictingActionsResolver: (apiDescriptions) => apiDescriptions.GetEnumerator().Current,
        schemaFilters: new List<ISchemaFilter>(){new ApplySwaggerSchemaFilterAttributes()},
        operationFilters: new List<IOperationFilter>()
          {
        //Enables XML comments and writes them to the MyAPI.XML file. These comments
        //are included in the generated swagger.json file.
            new ApplyXmlActionComments("MyAPI.XML"),
        //Enables the SwaggerResponse output class, to specify multiple
        //response codes for the API.
            new ApplySwaggerResponseAttributes()
          }
        );

        var swaggerString = JsonConvert.SerializeObject(
          swaggerDoc,
          Formatting.Indented,
          new JsonSerializerSettings
          {
            NullValueHandling = NullValueHandling.Ignore,
            Converters = new[] {new VendorExtensionsConverter()}
          }
        );

    //Writes the swagger.json file to the \output directory so that it can
    //be consumed by statis site generators.
        System.IO.StreamWriter file = new System.IO.StreamWriter("swagger.json");
        file.WriteLine(swaggerString);
        file.Close();
      );
    }
  }
}
After enabling these options, I could include code that enables the Swagger UI, but that interface looks a bit outdated. Also, I want to incorporate additional documentation written in Markdown, which the Swagger UI does not support. After reading online forums and posting questions to the Write The Docs channel on Slack, I discovered DapperDox.
Using DapperDox
DapperDox is an open-source documentation framework for OpenAPI specifications. Instead of having Swashbuckle publish our API specification in the Swagger UI, I added the following code to the Startup.cs file. This code writes the Swagger specification to a swagger.json file.
   System.IO.StreamWriter file = new System.IO.StreamWriter("swagger.json");
      file.WriteLine(swaggerString);
      file.Close();
DapperDox reads this file and displays it in its own UI. I installed DapperDox and pointed it at my swagger.json file, and saw nothing but error messages in my command prompt.
Reading through the DapperDox documentation, I discovered that “When specifying a resource schema object…DapperDox requires that the optional schema object title member is present.” This requirement was problematic because Swashbuckle does not include a method for adding members to a schema in the generated swagger.json file. Additionally, it took some tinkering in the code for me to realize that the missing title member on the definitions model is what caused DapperDox to break.
Fixing the output
The Swashbuckle documentation offered little help in this regard, so I turned to one of our developers. After reviewing the code together, my developer counterpart created a SwaggerTitleFilter method that adds a title member to the definitions model in the resulting swagger.json file. The title member displays in the generated documentation as a link to the referenced object, creating a hyperlink between the two objects.
The following code implements an IModelFilter that causes Swashbuckle to generate a title member for any schema. The SwaggerTitleFilter was referenced in the previous code sample
namespace MyAPI.Swagger
{
    public class SwaggerTitleFilter : IModelFilter
    {
        public void Apply(Schema schema,  ModelFilterContext mfc)
        {
            schema.vendorExtensions.Add("title", mfc.SystemType.Name);
        }
    }
}
I compiled the code and Swashbuckle generated an updated swagger.json file. With the title member added to the swagger.json output, I pointed DapperDox at the directory containing my swagger.json file.
.\dapperdox -spec-dir=C:\Bitbucket\APIproject\source
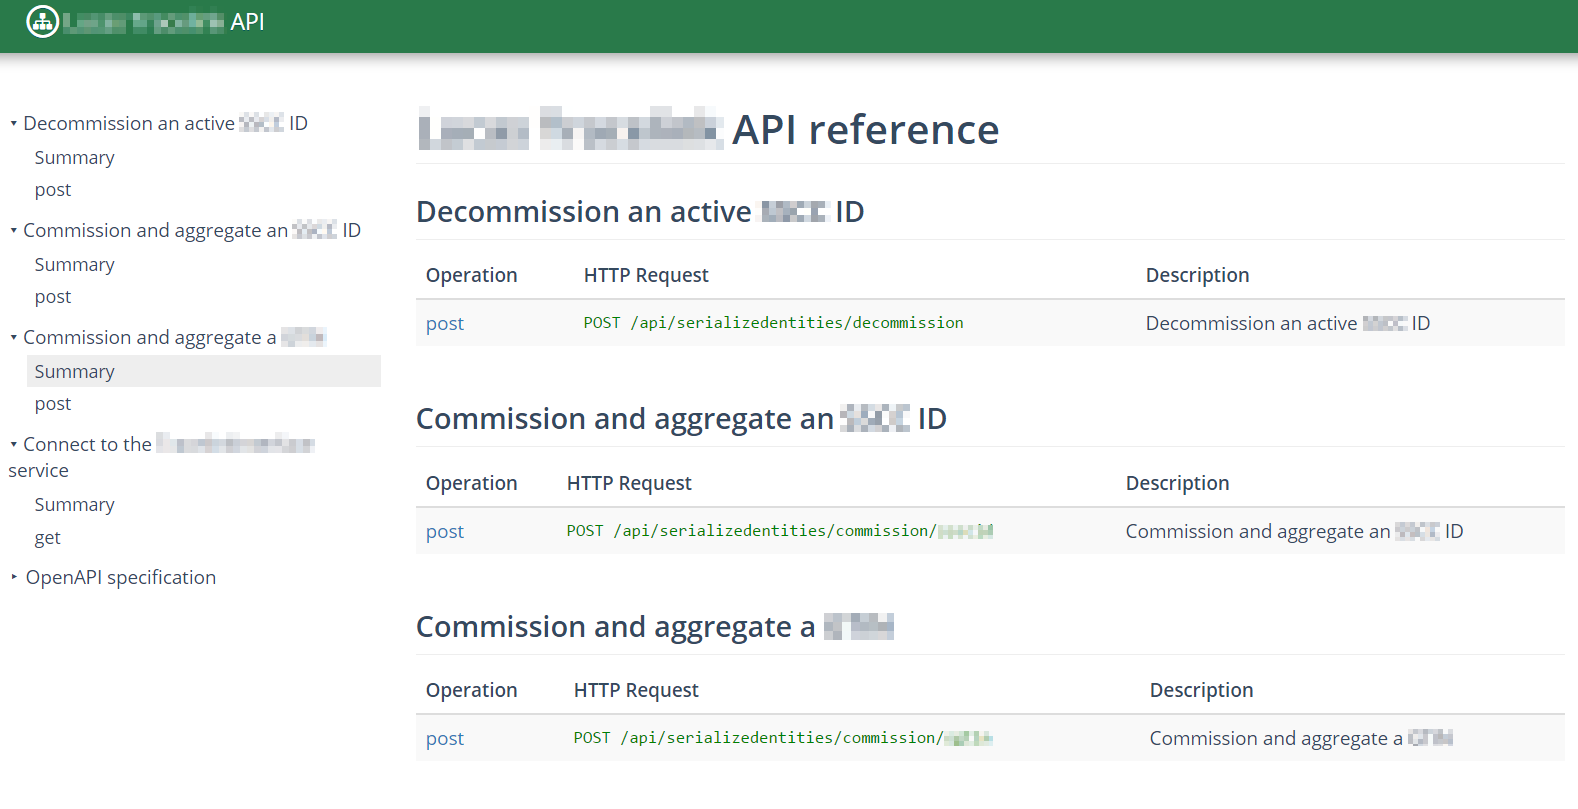
I opened a browser and entered http://localhost:3123, which is where DapperDox runs by default, and it worked! DapperDox displayed my swagger.json file and created interactive documentation that clearly displays the requests, responses, and query parameters for the API. I demoed the output to a few developers and support engineers, and they were over the moon.

Next steps
With this framework in place, we can extend Swashbuckle to future APIs and use DapperDox to host the swagger.json file for each. The resulting output lives with the code and provides documentation that developers and support engineers can access locally by running a single command.
To add documentation beyond just the generated JSON output, DapperDox works incredibly well. I can author short tutorials that describe how to integrate our API with third-party services, which developers can easily review and modify through pull requests. As the API grows, we can add a README file that describes enhancements, modifications, and new integration points. Non-API documentation will live in an \assets directory, which DapperDox includes at build time.
Each time that the code builds, the swagger.json file updates with the most current information. Developers and support engineers just run the .\dapperdox command and specify the directory where the swagger.json file lives. As the code changes, so does the documentation, so technical debt approaches zero.
Lessons learned
Static site generators are all the rage and for good reason. Providing a lightweight framework that can be deployed quickly is a huge asset when documenting APIs, especially external-facing documentation. Numerous options are available, but DapperDox felt like the right fit for our needs.
The pain of determining why DapperDox was broken and the additional coding required to fix the problem was worth the effort, and we are poised to integrate this process into the next set of APIs that our team develops.


